Setting up a FortiGate VM for a Home Lab
Fortinet is one of the leading manufacturers of next-generation hardware firewalls. Their products are well known throughout the field, and as one might suspect, their products and firmware licenses/support cost a fortune. That being said, buying these products for a home test lab environment is out of the question for most people. Luckily, virtual machines make learning the user interface and configuration of FortiGates much more feasible.
It's free to create a FortiCloud account. Once created, FortiGate VM images can be downloaded from the support section of the FortiCloud website for different products and platforms.
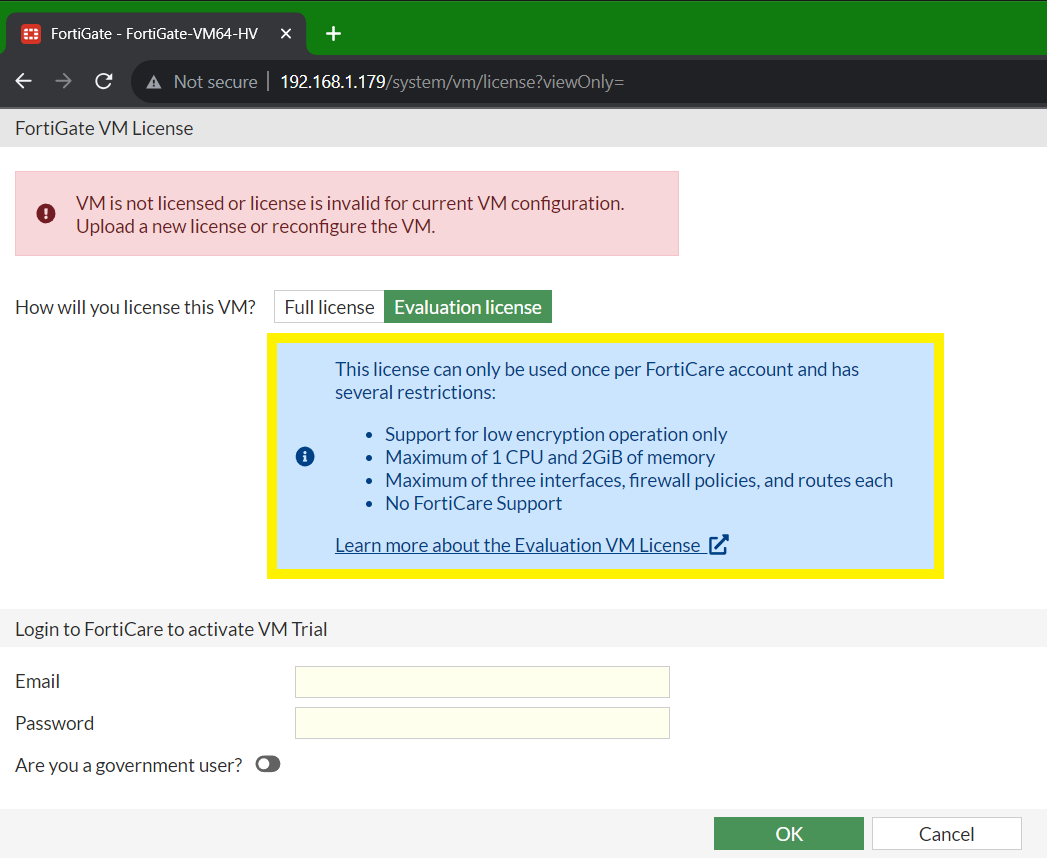
There are restrictions for these VM images, and it does also require using your FortiCloud account to register the trial license once installed. For the purposes of a home lab, to familiarize yourself with the user interface and basic configuration, the VM will suffice.
After downloading the FortiGate VM image for your platform of choice, you can then use 7-zip software to decompress the archive and reveal the virtual hard disk. I use Hyper-V for the platform as it is freely available with Windows Pro licenses.

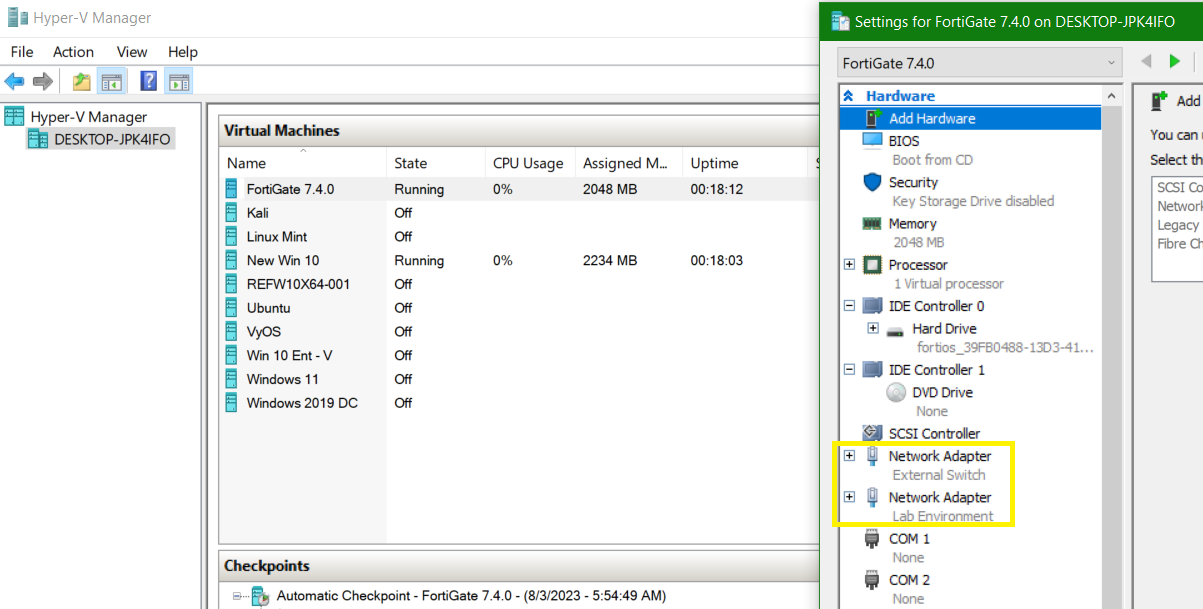
FortiGates require atleast 2 GB of RAM allocated. I configured an additional virtual network adapter, but that can also be added after creation as well. In the wizard, you can select the virtual hard disk file (.vhd) from the decompressed archive.
Hyper-V, as well as many other virtual machine managers, will allow the user to segment traffic between VMs and the host machine. With Hyper-V, we use the Virtual Switch Manager to set up one external switch, which allows the VM direct access to the internet, and an internal private virtual switch, which does not even allow direct communication between the virtual machine and the host machine.
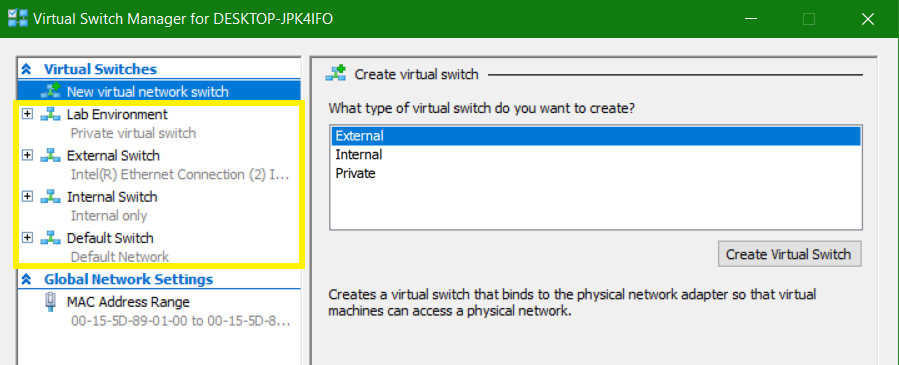
Using these two virtual switches, we place our FortiGate VM in between so that traffic from devices connected to the internal private switch must pass over the FortiGate. This ensures that our defined routing and filtering rules are applied to any other VMs as long as their virtual network adapters are connected to the internal private switch.
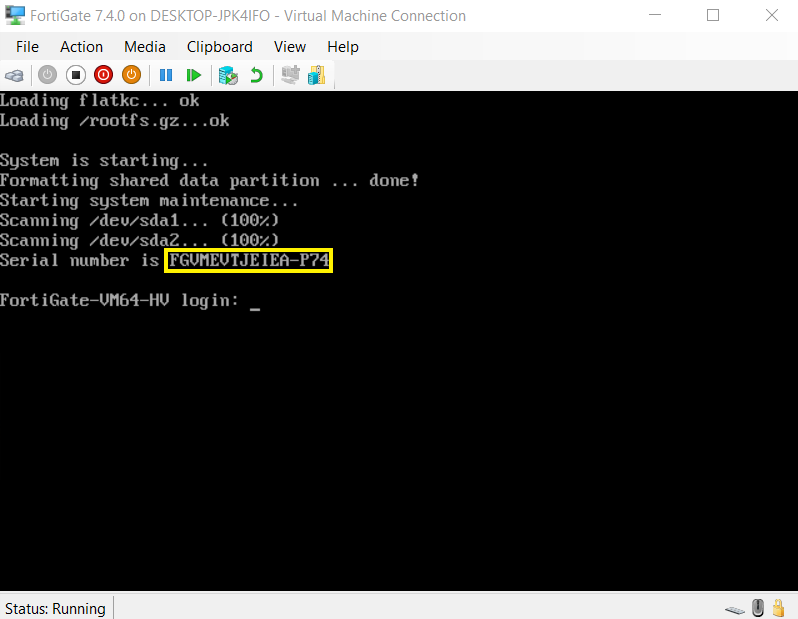
After going through the steps within the VM creation wizard and starting it, you'll be greeted with the CLI. A serial number for the FortiGate will be generated and displayed.
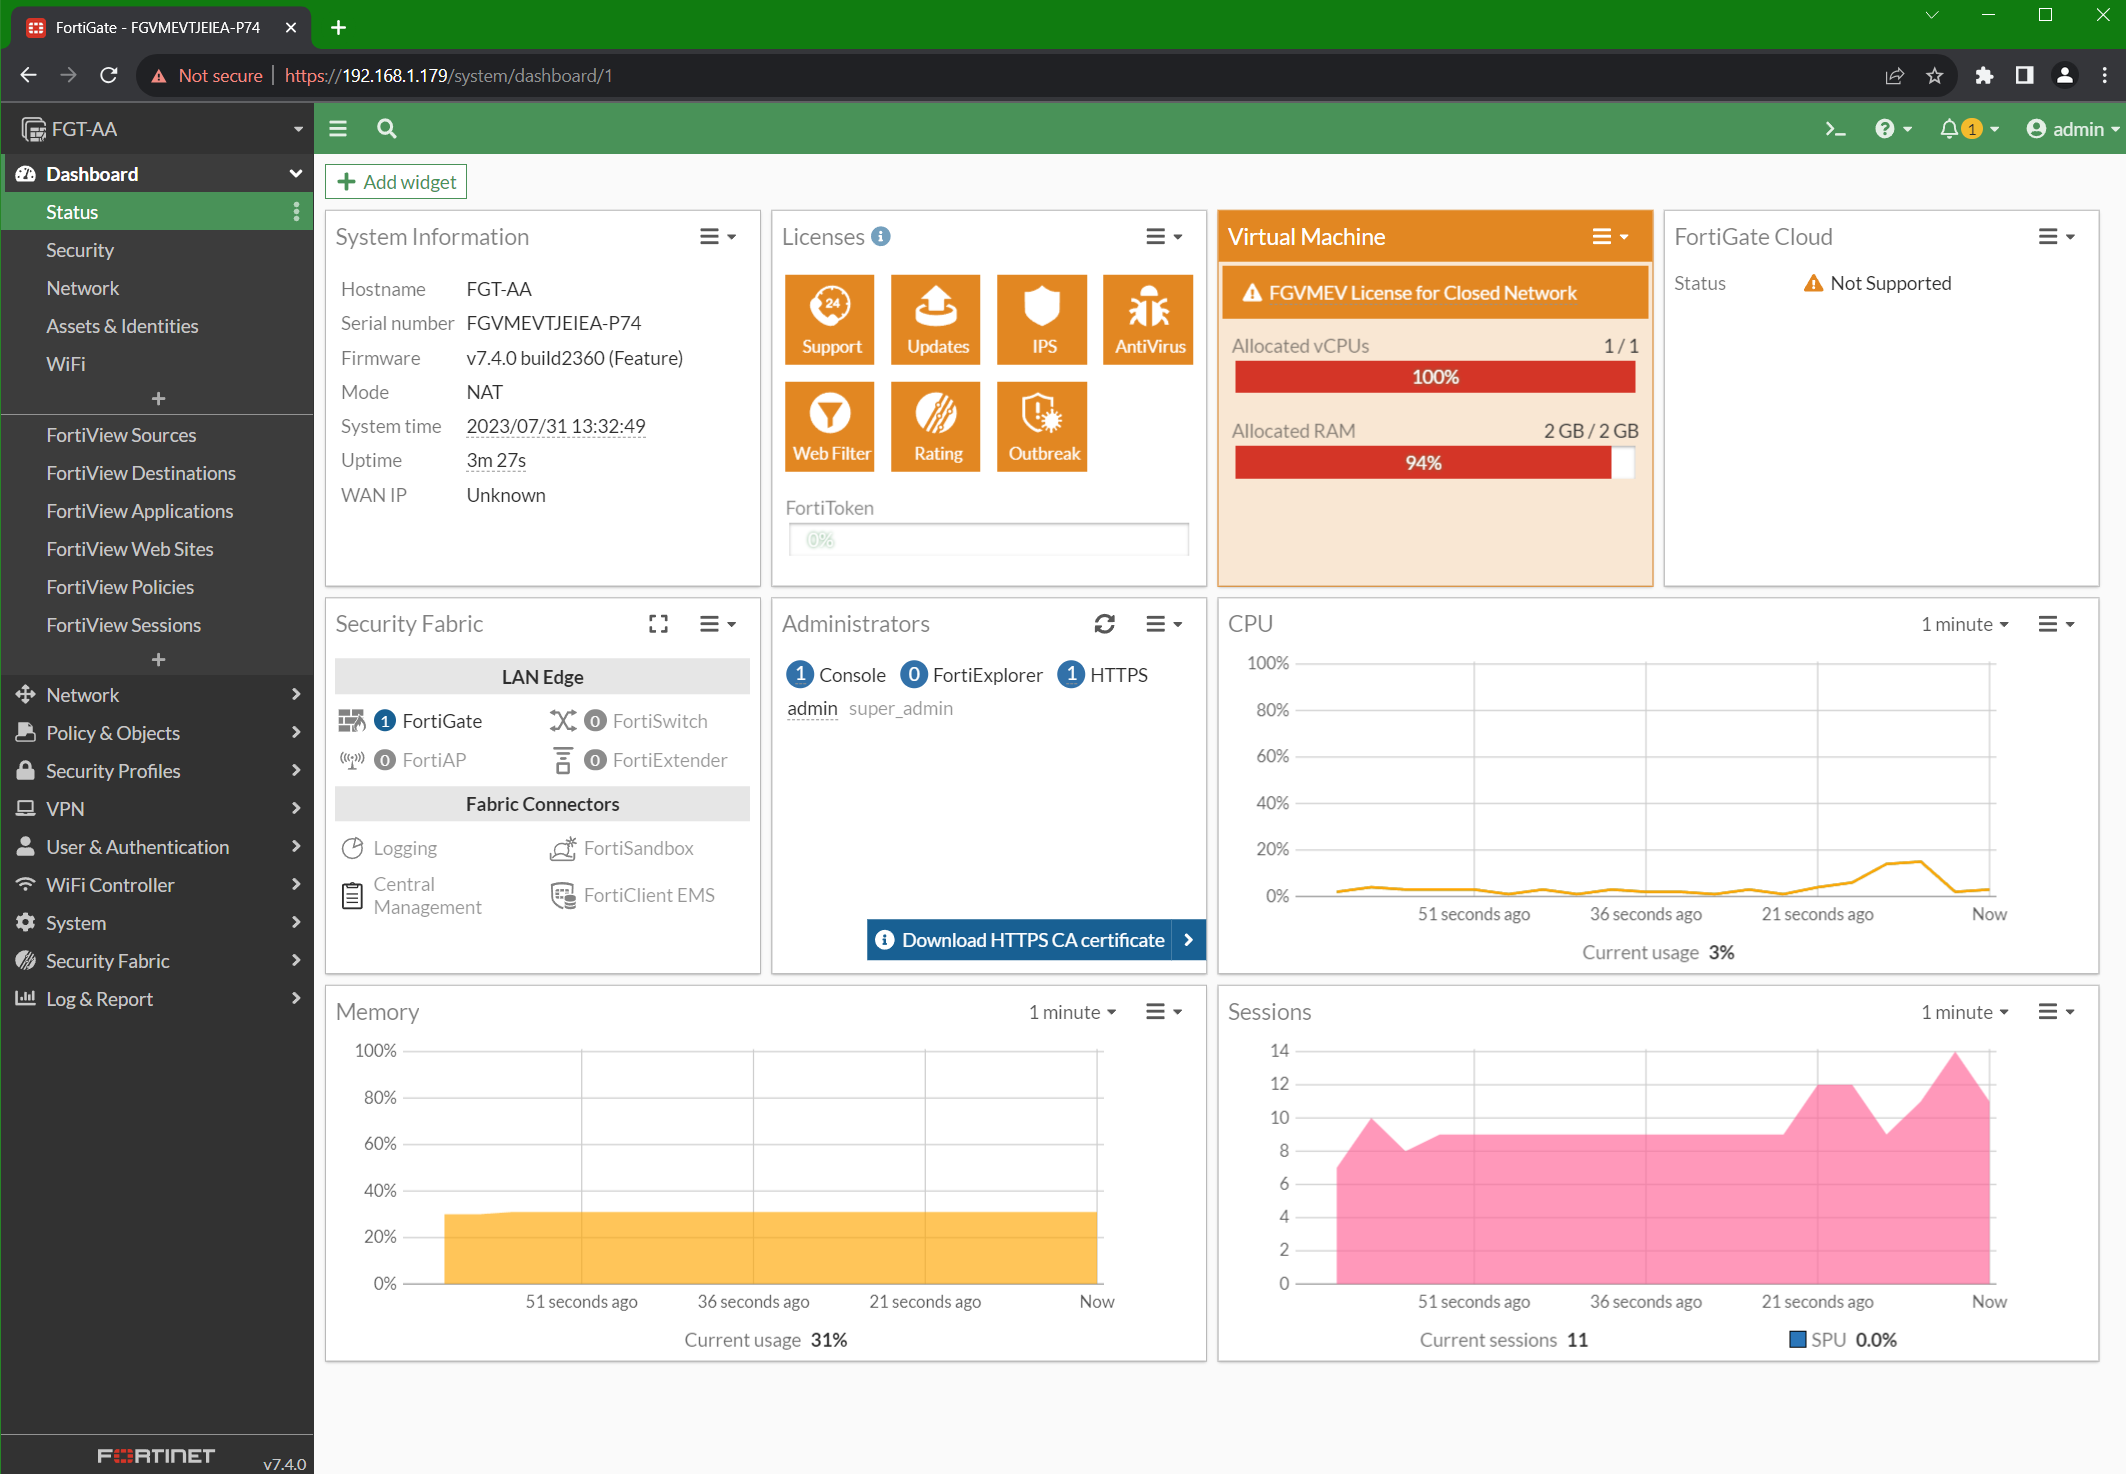
Logging in with the default username (admin) and password (empty) will then prompt you to change the default admin password. Once logged in, typing show system interface will display the portion of the configuration file relating to each interface. The "allowaccess" portion of the interface configuration is what controls whether the HTTP and HTTPS management web interfaces are accessible so that the CLI is not the only method of configuration. HTTP/HTTPS has to be enabled for each interface that is expeected to be used for management.
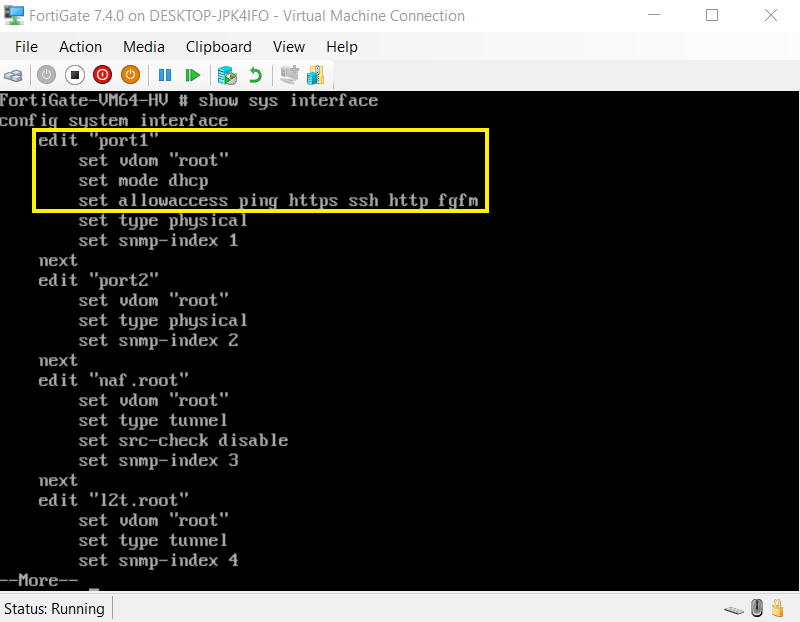
get system interface will show dynamic information for each interface.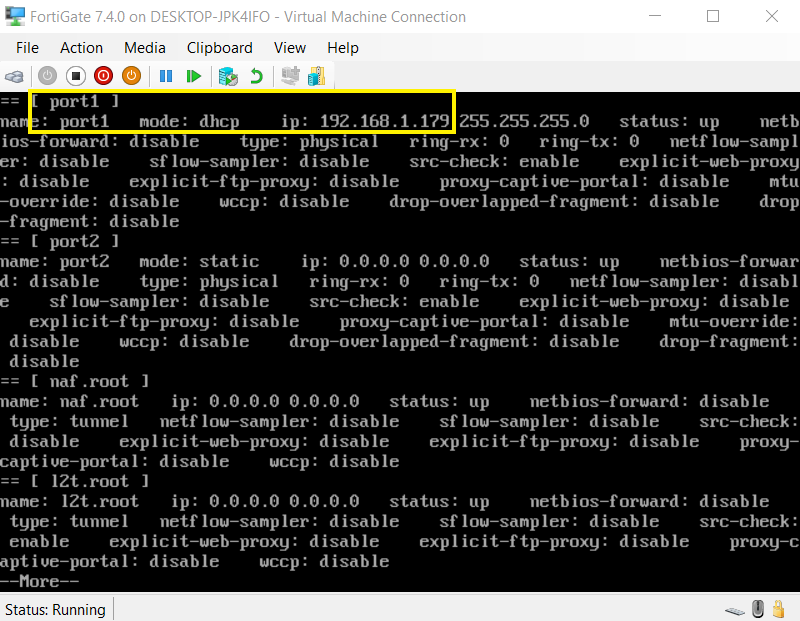
After copying the DHCP-assigned IP address from the external interface, navigate to it in the web browser. The IP for the external interface will be received from the same router that assigns an IP address to your host computer's network adapter, usually your home router.
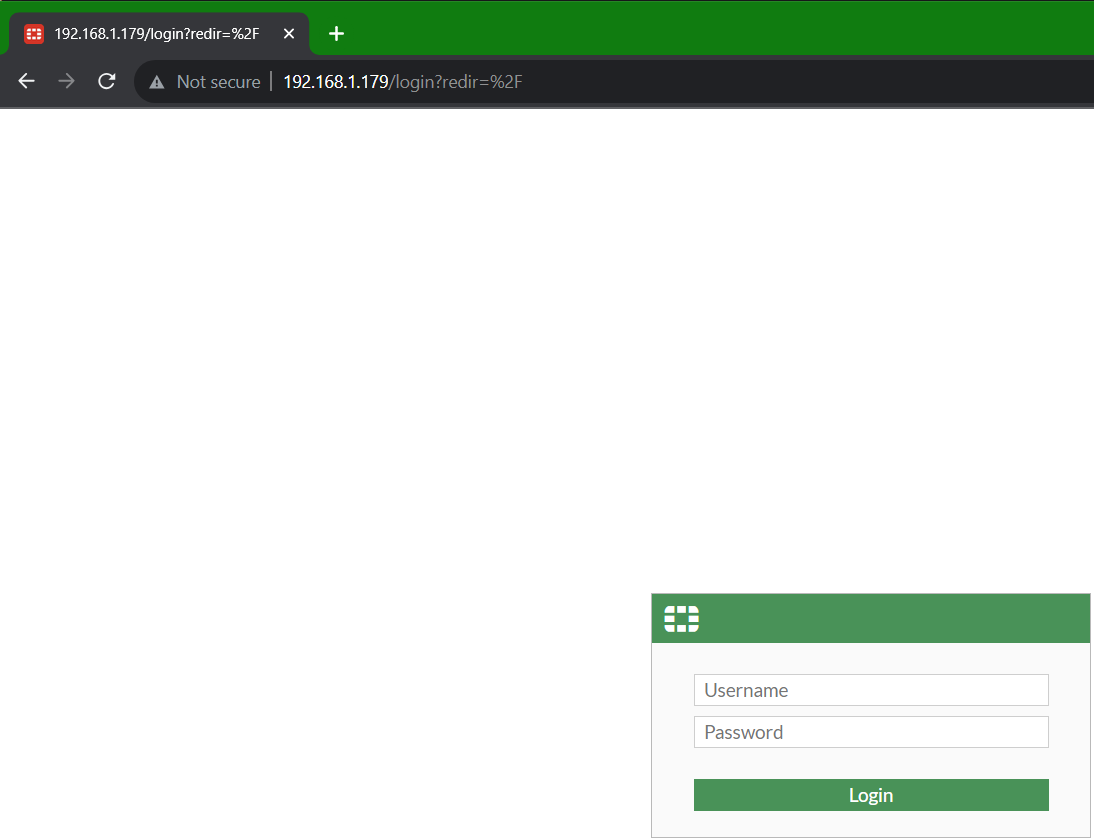
After signing in, you will then be taken to the FortiCare VM trial activation page where you can enter in your FortiCloud account credentials.